Sage Not Showing All Transactions

Table of Contents
ToggleSage Transactions Not Showing
In Sage recording, analyzing, or summarizing transactions are necessary for evaluating the financial status of the business. However some time users face errors while preparing finances for the tax returns. Unable to find transactions is a general error that happens during finance recording. ReconCileBooks will help you to resolve the Sage transactions missing or not showing issue even you check all Sage 50 Suspense Account closely.
Why Sage Doesn’t Show All Transactions?
- Why Sage 50 Transactions Disappears
- How To Get Back Sage Missing Transaction Entries
- Verify Date Of All Transaction
- Check Uncleared Last Month Transaction
- Confirm No Outstanding Transactions Last Month
- Match Reconciliation And Deposit Window
- Check All Damaged Transactions
- Match And Check General Ledger Report
- Check Reconciled Transactions
- Missing Transactions Error During Reconcile Reset
- Assistance For Sage 50 Transactions Not Found
- Question And Answer One Or More Transactions Missing Error Sage
What are the major causes of Sage doesn’t showing all transactions?
- Wrong start date or end date in a Statement
- Prior outstanding has not been updated yet
- Transactions have been recorded as historical during history mode
- Starting and end dates mentioned in a statement are the same
- Transaction having the wrong date
- After Sage 50 Bank Reconciliation Resetting the records of outstanding transactions are missing.

This is very essential to Reconcile Sage 50 Bank Account that all transactions should be matched and no transaction is untraceable.
Solve Sage 50 Transactions Not Showing
How to resolve Sage can’t show each transaction errors in Sage 50?
Walkthrough the below solution one by one to fix the issue:
Method 1- Date Verification
- Check the bank transaction filled in Sage 50 contains a correct date
- The date of the transaction should be on or before the Statement end date in the module named bank record
Method 2- Verify the Outstanding Transactions Still Not Cleared from the Last Months
Follow the instructions:
- Locate Add Prior Outstanding option
- Give a click on it
- Now choose the earliest transaction date to be added below Show Resolved Trans On or After tab
- Move over next field and click on the Resolve Transactions to check the list of transactions
- Choose the transaction that needs to be added
- Hit Add option
- If you are unable to discover outstanding transactions, click on the button which says Insert outstanding
- On-clicking it will start a manual entering of the outstanding transactions
- Hit OK
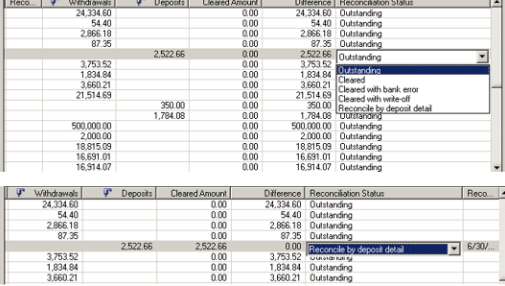
- Go to Reconciliation & Deposits window
- Click on the Transactions button to view the outstanding and active transactions.
Need Expert Help: Are you getting Sage 50 Not Showing All Transactions and don’t know how to solve it? In that case, you must get immediate help from our Sage 50 live chat experts by dialing +1-347-967-4079 the ReConcileBooks helpline number at any time.
Method 3- Check if there are No Outstanding Transactions of the Previous Months
Here are the steps:
- Locate Add Prior outstanding option and give a click on it
- Hit OK and it will display the ongoing transactions in the Transactions option of the Reconciliation & Deposit Window
- If it is not the initial bank reconciliation, verify the Statement End date is filled with the correct date
Things need to consider if the error happens while the first time bank reconciliation process:
- Click on Add outstanding Transactions Page
- It will display date wise transactions before the Statement Start Date
- There require inserting historical transactions one by one as per the instructions if the historical transaction is failed to appear
Method 4- Check the Details in a Reconciliation and Deposit Window

- Firstly verify the right account is chosen
- Check the start date of the statement should match the start date of the bank statement
Method 5- Check the Damaged Transactions
- Open Reports
- Click Financials
- Choose Transactions by Account
- Hit Account
- Now you need to set the starting and finishing date; it should be the same as the bank reconciliation
- Write check marks to corrections
- Hit OK
- In case there are transactions appears on the report you need to run the Advanced Database Check
- Check the General Ledger report
- make sure the Finish date is set to the advanced transaction date. It should be the same as in Setup, Settings, information, and company
- If the report does not contain the transactions then the company file should not have any transactions set for the particular period
- Check the dates in the transactions
Get the details to Solve Sage 50 Unresolved Amount Issue which is the bigger issue during reconciling Sage 50 accounts.
Method 6- Check the General Ledger Report Associated with the Right Accounts for Transactions
Here are the steps:
- Click on Reports
- Hit Transactions Details/Journal Entries
- Click All
- Choose the right year
- Click on the correct date for the Report by
- Fill in the right Start & Finish Date
- Give a click on Corrections to show
- Hit OK
- Check the accounts linked to the transactions
Do you know that all types of reconciling process, not same Accounts Receivable Sage 50 Reconciliation process is quite different from Sage 50 Creditors Reconciliation.
Method 7- Check the Transactions Were Posted During Bank Reconciliation
- Go to the Account Reconciliation Window
- Hit Save option
- Now close the window named Reconciliation & Deposit window
Method 8-Check the Missing Transactions Error that Happens after Resetting Bank Reconciliation
- For this, you need to restore the backup
- After that open the company file
- Click on Reports, choose the Banking option and then click Account Reconciliation Report
- Hit Report type and check summary reports with details regarding the outstanding transaction
- Choose the correct bank account
- Now check the statement start and end date and set it similar as entered while reconciliation
- Hit Ok to open the report
- Choose to print or open in Microsoft Excel to save the report
- Open Account Reconciliation Window using the original company
- Click on the Add Prior Outstanding option once you choose the account
- Now use the printed copy of the report to add by choosing transactions before the date window or by entering all outstanding transactions
- Hit Ok button
- Check the missing transactions that appears
- Remove the newly restored company file
Help Sage 50 Transactions Not Showing In Reconciliation
ReconCileBooks includes the resolutions that are necessary to fix the Sage doesn’t show all transactions error. You just require them to follow the correct instructions to get positive outcomes. In case, you are not able to perform any of the methods then get expert assistance. Get connected with the Sage professional team through different mediums like Sage 50 Support Number, email, or a Sage 50 Live Chat that you come to know when opening the website directly.
Frequently Asked Questions (FAQ’s)
What If I Need To Remove The Data File In Sage 50?
➧ First, open the company file that you need to delete
➧ Click on the File menu
➧ Hit Properties option
➧ Enter the location & the name of the company file
➧ Close the Sage 50 application
➧ Now open the Window Explorer
➧ Browse the location of the company file
➧ Find the folder.SAI file &.SAJ folder and delete both of them
Get details also troubleshooting steps Sage 50 Required Data File Missing issue and error.
How Do I Fix The Missing Transactions In The Bank Reconciliation?
➧ Check the end date appears in the month-end
➧ Check the end date in the statement should be later than or same as the statement start date; if not change the date to the correct date
➧ Use the back-up restore option to re-post the transactions
How Can I Verify The Missing Transactions If It Is Due To Data Corruption?
For this click file button, choose Maintenance and then click Check Data
How To Run An Advanced Database Check To Verify Transactions Showing In A Report?
➧ Open Windows Explorer
➧ Browse C:drive, Program Files (x86), Sage 50
➧ Click dbverifier button
➧ Find Sage_SA_DBVerifier.exe(application) and double-click on it
➧ Discover the data file location
➧ Choose Advanced Check & Repair button
Report your Issue
Latest QuickBooks Topic
- QuickBooks Desktop 2024 Download, Features and Pricing
- Traverse to QuickBooks Data Migration
- Microsoft Access to QuickBooks Data Migration
- How to Fix QuickBooks Payroll Update Error 15243?
- How to Fix QuickBooks Error Code 12057?
- Maxwell to QuickBooks Data Migration
- Master Builder to QuickBooks Data Migration
- How to Fix QuickBooks Error Code 15223?
Accounting Issue and Problem
- SAGE 50 2022 Canada Download
- Installing SAGE 50 on Windows 11
- QuickBooks Payroll Item List Does Not Appear
- QuickBooks Firewall Blocking
- How to Email QuickBooks File
- Why QuickBooks Slow
- Why QuickBooks Freezing
- QBWC1085
- QuickBooks Scan Manager
- QuickBooks Payroll Liabilities Not Showing
- QuickBooks Unable to Send Emails Due to Network Connection Failure
- QuickBooks Utility Application
- QuickBooks Unable to Save
- How to UnFreeze QuickBooks
Search by Categories
